I use Docker Compose for my environments, and one recurring issue I faced with the production was the downtime when I’m updating the app and running docker compose up -d. It would often take between 15 seconds to 1 minute in some cases, and it was not acceptable for users to have the app down for so long.
The blue/green deployment strategy was the solution, but everything I read online suggested to use Docker Swarm or Kubernetes. I don’t know these stacks, and I don’t want to complicate my current setup even though I know these tools are designed for this.
For several days, I tried to find an article on how to create a blue/green deployment with only Docker Compose, but I’m either bad at Googling, or no such blog post exists for my use case. For years, I have been using open-source projects, and it’s time for me to give back and explain how I created a simple blue/green deployment using only Docker Compose and GitHub Actions.
What is the blue/green deployment?
The blue/green deployment is a strategy to reduce downtime and risk during application updates. It works by running two identical environments, blue (the live version) and green (the new version).

When a new version is ready, it’s deployed to the green environment. After verifying it works correctly, the incoming requests are switched from blue to green.

And on the next deployment, we’re going from green to blue, etc.
Since I’ve implemented this, I can push multiple new versions of my app and users never notice the switch between the versions.
How does it work?
All deployment steps will be done using GitHub Actions. A new release on our repository will trigger a job that builds our Docker image, connect to the remote server, and update the containers.
Primfeed is based on Dunglas’ symfony-docker repository, but I’ve modified it to match a production application and its needed services: It supports cron tasks, asynchronous messages using Symfony Messenger, SQL Migrations on each deployment, and environment variables shared via GitHub Actions.
The infrastructure is using Traefik for the reverse proxy. Traefik uses a labels system, it’s easy to set up, and it will route our incoming requests to the correct containers.
💡 The complete files will be available in GitHub Gists at the end of this article.
Setting up GitHub Actions
We need two things: The PROD_DEPLOY_COLOR variable used to switch between blue and green, and a token that allows the CI to change this variable.
For the variable, go to your repository settings, under Secrets and variables, click Actions. Choose the tab Variables, then click New repository variable. Create a new variable named PROD_DEPLOY_COLOR and set its value to blue.

To create the token necessary for the CI to change the variable between blue and green, visit https://github.com/settings/personal-access-tokens and generate your Fine-grained token. Set the desired expiration date, and set the access to Read and Write for the Variables.

Once you have your token, add a new secret to your repository: GH_TOKEN_SET_VARIABLES with the token you just created.
Preparing the Docker Compose files
We will use the Extensions from Docker Compose to share the config between our multiple containers.
x-env: &env
    APP_VERSION: ${APP_VERSION}
    DATABASE_URL: ${DATABASE_URL}
    # ... your other envs

x-php-app: &php-app
    image: ghcr.io/username/repository:${APP_VERSION}
    restart: unless-stopped
    healthcheck:
        test: ["CMD", "sh", "-c", "! [ -f /run/force-unhealthy ] && curl -fsS http://localhost:2019/metrics"]
        interval: 5s
        timeout: 5s
        retries: 3
        start_period: 60s
    labels:
        - "traefik.enable=true"
        - "traefik.http.routers.app.rule=Host(`your-domain.com`)"
        - "traefik.http.routers.app.entrypoints=websecure"
        - "traefik.http.routers.app.tls=true"
        - "traefik.http.routers.app.tls.certresolver=le"
        - "traefik.http.services.app.loadbalancer.server.port=80"

services:
    php-green:
        <<: *php-app
        environment:
            CONTAINER_COLOR: green
            <<: *env

    php-blue:
        <<: *php-app
        environment:
            CONTAINER_COLOR: blue
<<: *envThis is the edited docker-compose.prod.yml I’m using. It contains:
- The blue and green containers.
- The extensions for our environnements variables and our base config for the PHP.
I will explain what’s the /run/force-unhealthly is for in the CMD later in this article, but I’m sure the name gives a hint!
Using GitHub Actions
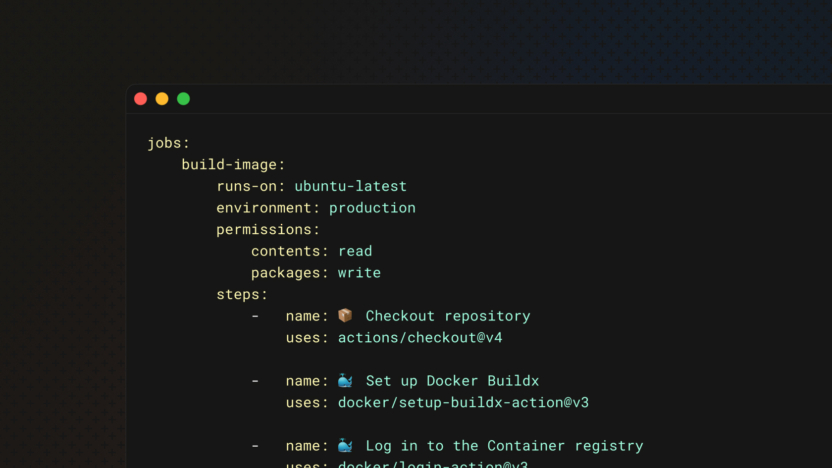
The first step we need is to build our image. This can be done using the official actions from Docker. We enable the cache to speed up the process for the next release, and we properly tag the image to the latest. I personally tag the image with the version name as well, but it’s a personal perference.
jobs:
  build-image:
    runs-on: ubuntu-latest
    environment: production
    permissions:
      contents: read
      packages: write
    steps:
      - name: 📦 Checkout repository
        uses: actions/checkout@v4

      - name: 🐳 Set up Docker Buildx
        uses: docker/setup-buildx-action@v3

      - name: 🐳 Log in to the Container registry
        uses: docker/login-action@v3
        with:
          registry: ${{ env.REGISTRY }}
          username: ${{ github.actor }}
          password: ${{ secrets.GH_TOKEN }}

      - name: 🐳 Extract metadata (tags, labels) for Docker
        id: meta
        uses: docker/metadata-action@v5
        with:
          images: ${{ env.REGISTRY }}/${{ env.IMAGE_NAME }}

      - name: 🐳 Build and push production image
        uses: docker/build-push-action@v6
        with:
          context: .
          push: true
          target: frankenphp_prod
          tags: ${{ env.REGISTRY }}/${{ env.IMAGE_NAME }}:latest
          labels: ${{ steps.meta.outputs.labels }}
          cache-from: type=registry,ref=${{ env.REGISTRY }}/${{ env.IMAGE_NAME }}:prod-buildcache
cache-to: type=registry,ref=${{ env.REGISTRY }}/${{ env.IMAGE_NAME }}:prod-buildcache,mode=maxWhen the image is built we can use it on the remote server. The first step before the deployment is to get the current color, and deduce the next color. We will use your token for this action.
jobs:
  deploy:
    needs: build-image
    runs-on: ubuntu-latest
    environment: production
    steps:
      - name: 🎨 Deployment colors
        env:
          GH_TOKEN: ${{ secrets.GH_TOKEN_SET_VARIABLES }}
        run: |
          CURRENT=$(gh variable get PROD_DEPLOY_COLOR --repo $GITHUB_REPOSITORY --json value -q .value)
          echo "CURRENT_DEPLOY_COLOR=$CURRENT" >> $GITHUB_ENV

          if [ "$CURRENT" = "blue" ]; then
              echo "NEXT_DEPLOY_COLOR=green" >> $GITHUB_ENV
          else
              echo "NEXT_DEPLOY_COLOR=blue" >> $GITHUB_ENV
fiThen, let’s deploy the new color to the remote server. The key here is to use the custom CMD we setup in the docker-compose.prod.yml file.
Once the next color is healthy, we force the current color to become unhealthly using an empty file. We create an empty file /run/force-unhealthy and after ~15 seconds (depending on your retries strategy), the container become unhealthy.
- name: 🚀 Deploy API
  uses: appleboy/[email protected]
  with:
    host: your-remote-ip
    username: your-username
    key: ${{ secrets.SSH_KEY_HOST_API }}
    envs: APP_ENV,DATABASE_URL
    script: |
      set -e

      cd ${{ env.PROJECT_PATH }}
      git pull

      echo "🧙 --- Pull the new release"
      docker compose -f docker-compose.yaml -f docker-compose.prod.yaml pull

      echo "🧙 --- php-${{ env.NEXT_DEPLOY_COLOR }} is starting..."
      docker compose -f docker-compose.yaml -f docker-compose.prod.yaml up -d --no-build php-${{ env.NEXT_DEPLOY_COLOR }}

      echo "🧙 --- Getting container IDs"
      NEXT_DEPLOY_COLOR_CONTAINER_ID=$(docker compose -f docker-compose.yaml -f docker-compose.prod.yaml ps -q php-${{ env.NEXT_DEPLOY_COLOR }})
      CURRENT_DEPLOY_COLOR_CONTAINER_ID=$(docker compose -f docker-compose.yaml -f docker-compose.prod.yaml ps -q php-${{ env.CURRENT_DEPLOY_COLOR }})

      echo "⚙️ --- php-${{ env.CURRENT_DEPLOY_COLOR }}: $CURRENT_DEPLOY_COLOR_CONTAINER_ID"
      echo "⚙️ --- php-${{ env.NEXT_DEPLOY_COLOR }}: $NEXT_DEPLOY_COLOR_CONTAINER_ID"

      echo "🧙 --- Waiting for php-${{ env.NEXT_DEPLOY_COLOR }} to become healthy..."
      while [ "$(docker inspect --format='{{.State.Health.Status}}' "$NEXT_DEPLOY_COLOR_CONTAINER_ID")" != "healthy" ]; do
        sleep 1
      done
      echo "🧙 --- php-${{ env.NEXT_DEPLOY_COLOR }} is healthy."

      echo "🧙 --- Forcing php-${{ env.CURRENT_DEPLOY_COLOR }} to become unhealthy."
      docker compose -f docker-compose.yaml -f docker-compose.prod.yaml exec php-${{ env.CURRENT_DEPLOY_COLOR }} touch /run/force-unhealthy

      echo "🧙 --- Waiting for php-${{ env.CURRENT_DEPLOY_COLOR }} to be unhealthy, it should takes ~15s."
      while [ "$(docker inspect --format='{{.State.Health.Status}}' "$CURRENT_DEPLOY_COLOR_CONTAINER_ID")" = "healthy" ]; do
        sleep 1
      done

      echo "🧙 --- php-${{ env.CURRENT_DEPLOY_COLOR }} is unhealthy. Waiting 10s for Traefik to stop sending requests there."
      sleep 10

      echo "🧙 --- Stop gracefully php-${{ env.CURRENT_DEPLOY_COLOR }}. Will timeout after 90s."
      docker compose -f docker-compose.yaml -f docker-compose.prod.yaml stop -t 90 php-${{ env.CURRENT_DEPLOY_COLOR }}
Finally, let’s set the new color as the current in our GitHub repository variables.
-   name: 🎨 Set color to ${{ env.NEXT_DEPLOY_COLOR }}
    env:
        GH_TOKEN: ${{ secrets.GH_TOKEN_SET_VARIABLES }}
    run: |
gh variable set PROD_DEPLOY_COLOR --repo $GITHUB_REPOSITORY --body "${NEXT_DEPLOY_COLOR}"Traefik is doing a lot of work for us
When containers have the same Traefik labels, Traefik will split the requests between the healthy containers and this part is important because this is what we use at our advantage.
With GitHub Actions, we force the current color to go unhealthy which will cause Traefik to only send new requests to our new color. After waiting a few seconds to be safe, we can gracefully stop the current color container.
Something to keep in mind here is the timeout when we execute the command docker compose stop. By default, after 10 seconds Docker Compose will force kill the container. In our case, since users may still upload pictures, we override this limit to 90 seconds with docker compose stop -t 90. Once all requests have been processed on the current color container, it will stop.
Disclaimer
This solution is not the best since tools like Docker Swarm and Kubernetes exists and can handle all of that.
As I explained at the beginning of this article, I needed to solve the downtime for every update I made on my app and I didn’t want to change my tools or the way it was setup just yet.
‼️ Lastly, if you’re going into the blue/green deployment, ALWAYS make sure that your old and new code are compatible, as well as your old and new database schema. Otherwise your users will experience downtime.
Bonus – Links
As a bonus, I’m sharing the different files that I use to build and deploy my complete stack. Based on dunglas/symfony-docker, it adds the cron tasks, SQL migrations and asynchronous workers.
You can find the Gist containing the files here.
Enable cron in your containers
To enable cron, add the following to your Dockerfile
COPY frankenphp/crontab.txt /etc/cron.d/app-cron.txt
RUN /usr/bin/crontab /etc/cron.d/app-cron.txtAdd the line in your docker-entrypoint.sh
service cron startFinally, for each cron task, make sure to add a check on the /run/cron-enabled file that will be removed/added during the deployment.
* * * * * [ -f /run/cron-enabled ] && /usr/local/bin/php /app/bin/console app:scheduled_posts:post -vv >/dev/stdout 2>&1